
After the eventful launch of BTIR-1, and some consultation with a very patient expert, it was decided that BTIR-1 had some stability issues.
BTIR-2 is here to try and rectify this, because learning from mistakes is how learning works.
First off, the problems with BTIR-1 as deduced from testing:
- Instability caused by being too short (OpenRocket gave it a cal of 0.35, which means its not very stable)
- Too thick and insignificant fins
- Not really extendable (built for 1 specific motor with no payload)
All these problems, and more, are fixed using the new BTIR-2 system!
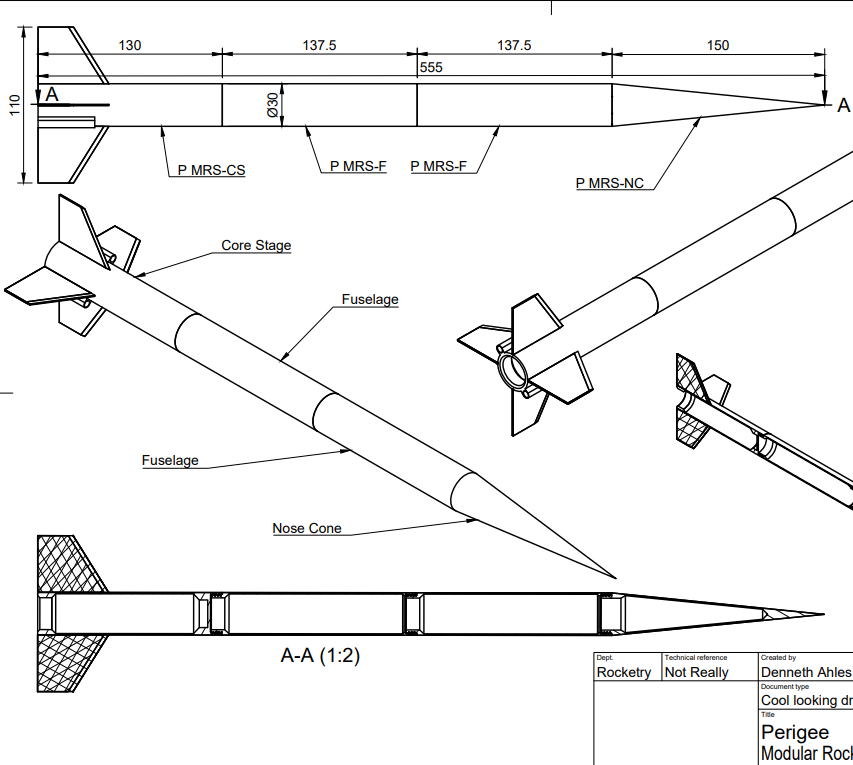
Although “Ballistic Trajectory and Impact Rocket” I consider to be a outdated acronym. So I now prefer MRS (Modular Rocket System), for reasons which should become obvious after reading this article.
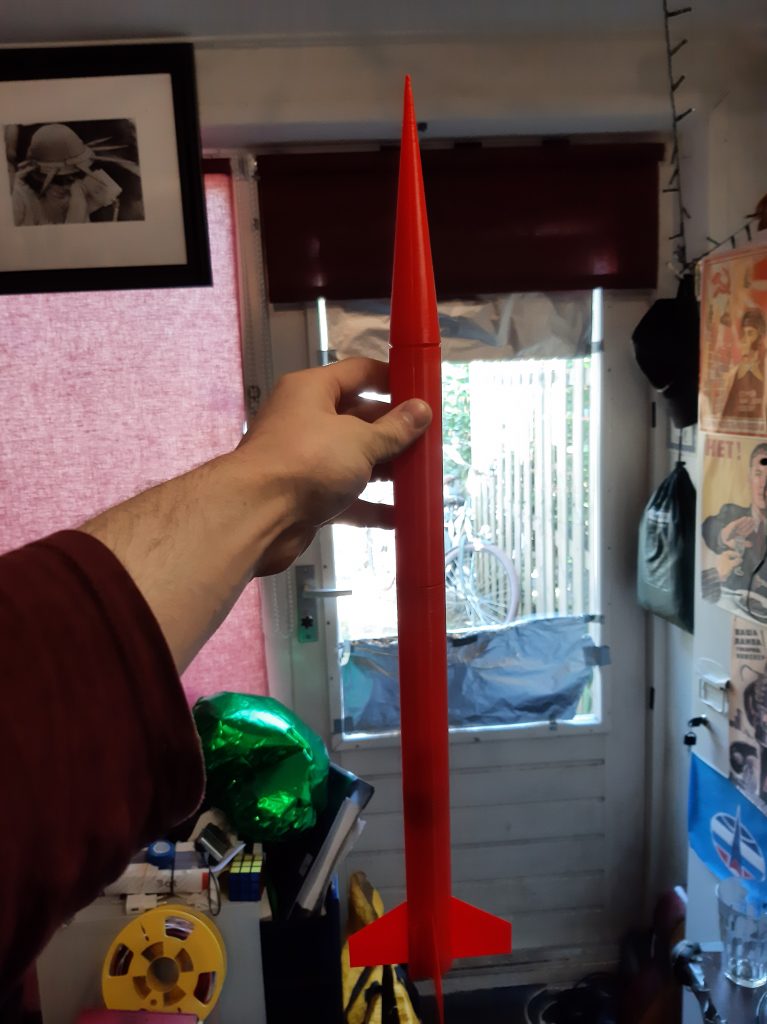
The first major change is the length, which was increased to a grand 55.5 cm, with BTIR-1 being only 13.45 cm.
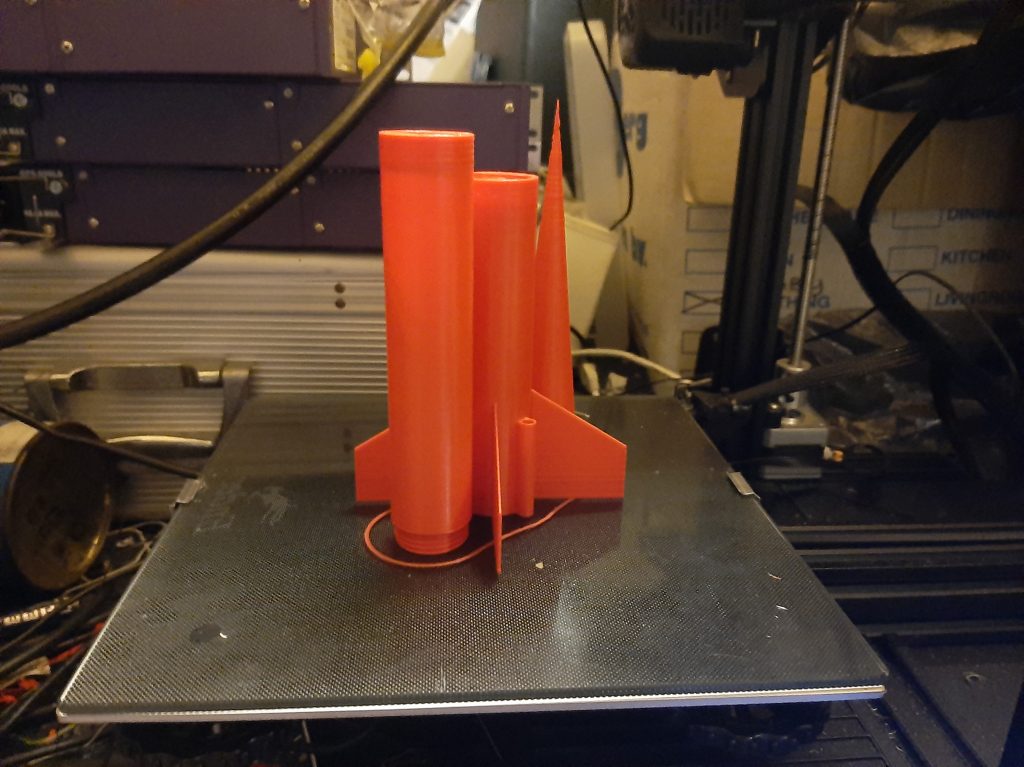
A part of this length cannot be printed on my trusty Ender 3 V2, which has a max print height of 30cm, so the next step was making it m o d u l a r.
This was done by adding standardized screw connectors to the top and / or bottom of various parts, so that they may be screwed together after printing.
Furthermore, to exclude instability from drag alone, the whole fin and launch lug assembly was made fully symmetrical, so if it spins out of control its not the placement of the fins.
And lastly, the fins were changed to a more sensible design, and made thinner to decrease drag.
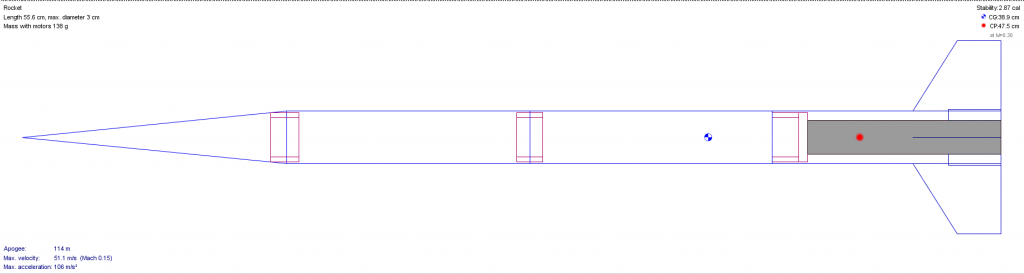
Blueprints were also made, to detail the modules making up Perigee and the configuration itself.
Perigee is made up of 4 parts, which are themselves of 3 types.
The core stage holds the rocket motor (Specifically a PM-19 of my own design).
It also, being the bottom most part, contains the fins and launch lugs.
By making all this into a single part, a new design for a different motor or with a different fin design can easily be created, without having to print the entire thing again (as was the case with BTIR-1)
This is also the case in case a fin breaks of or some other damage is incurred, in which case the broken part can easily be reprinted and replaced, in a matter of hours.
Next up, the fuselage.
Perigee uses 2 of these to achieve the desired length, and they are basically nothing more than a threaded tube.
Their entire function is to increase the length of the rocket, without incurring significant weight onto the vehicle.
They could also hold a payload, which is why the modular-ity is once again important.
I could simply modify the current fuselage design to perfectly hold a improved flight computer, and screw it in place.
No large scale redesigns needed.
Then comes the nosecone, which is once again a purely structural part to give the rocket the desired aerodynamic characteristics.
The modularity here is welcome, since the design can be modified to allow for a non threaded nosecone which can be popped off in tandem with a parachute system, once again allowing the vehicle to be substantially modified without significant material or time costs.
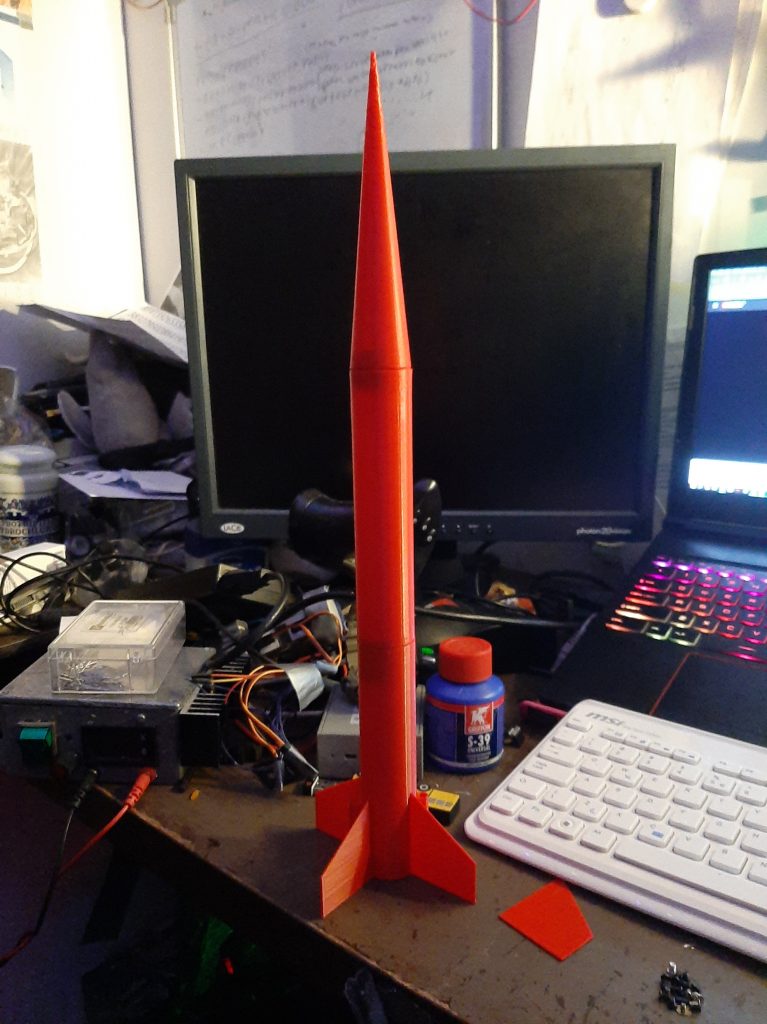
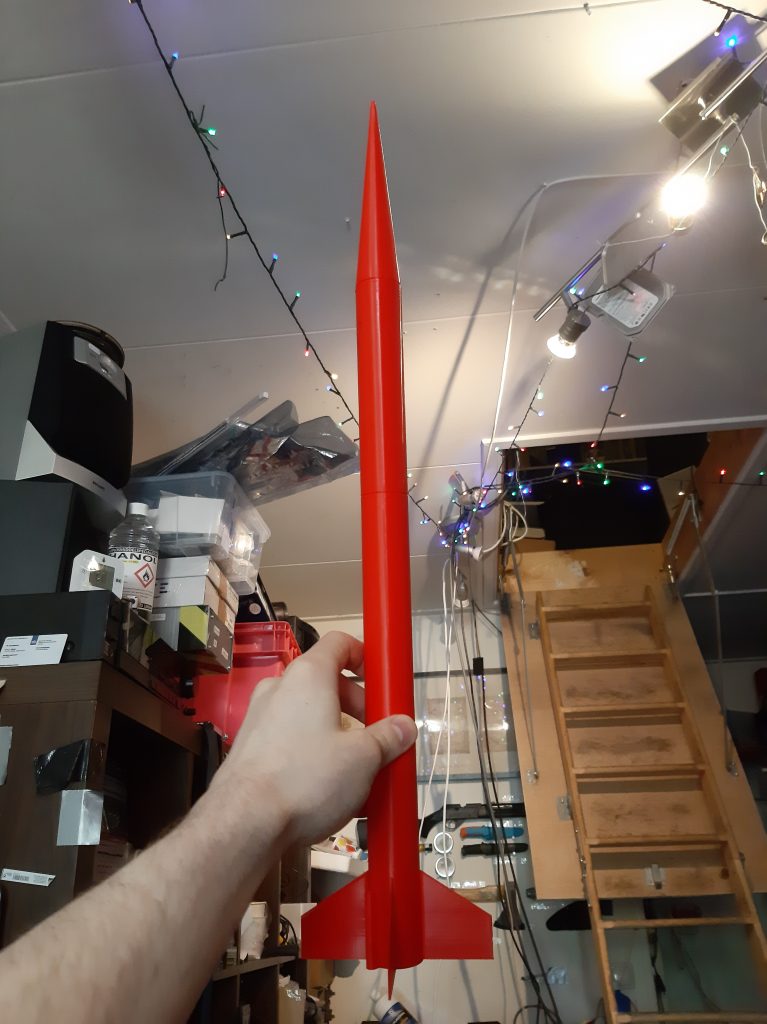
And the finished perigee as it was designed, mainly here to look really cool.
And, for reference, the current blueprints of PM-19, made after R-13 was tested.
While these look really cool in my opinion, they don’t really matter, since they were derived from the 3d models I designed, and since its 3d printed that’s all I need.
Basically: Blueprints are for humans, and this rocket is fully robot assembled.
Speaking of which, I already printed it!
And now, for some statistics (segues are hard ok)
| Length | 55.5 cm |
| Girth (Width) | 3 cm |
| Wall thickness | 1 mm |
| Print time (All modules) | ±13.5 hours |
| Print time, average per module | 3-4 hours |
| Stability Factor (Calculated) | 2.87 cal |
| Simulated Altitude | 120 Meters |
| Simulated Max Velocity | 50 m/s |
| Simulated Time to Apogee | 5.3 seconds |
| Simulated Total Flight Time | 16 Seconds |
| Simulated Ground Hit Velocity (Ouch) | 16 m/s (57.6 km/h) |
All values are also averaged between the two, and thus not exactly accurate to either.
All simulations were done using OpenRocket
Take these with a grain or 2 of salt.
Now, as you can see, if it launches as intended it won’t be launched again after reaching the ground.
This is by design.
I have limited funds and time, and parachutes are hard.
So, I am trying to first make a working rocket, before figuring out how to land it safely too.
Basically, if the launch is completely foiled by a unstable rocket engine or major design flaw, I won’t have lost a parachute system too.
A parachute system that will probably cost much time and money to design, and is not guaranteed to work.
Thus, this rocket is supposed to go straight up, and then straight down.
This makes it lighter, simpler, cheaper, and expendable as a result.
And due to the aforementioned modular design, it can easily be upgraded with flight computers and parachute ejectors when the time comes.
The plan now is to make R-15, and launch ‘Perigee’ using it.
This is hopefully possible before the month is out, assuming no external factors intervene.
If it works out, a flight computer and parachute system is to be developed.
If it does not, back to the drawing board I go.
If you are interested in the 3d designs of this rocket, feel free to contact me.
Otherwise, see you in the next article!