
After 3 days of coding, 2 days of construction and 2 months of procrastinating the first version of my Flight Computer is finished
The only difference between science and screwing around is writing it down
Adam Savage (Quoting Alex Jason)
This is one of the main principles I follow when testing my rockets, and documenting them here
This is why I wanted to build a flight computer to recover as much data from a launch as possible
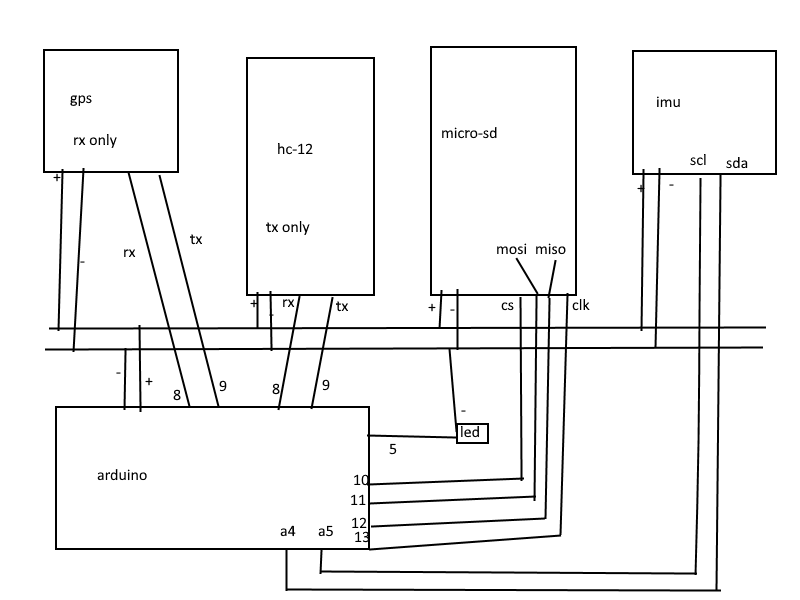
It consists of a IMU (Inertial Measurement Unit), GPS, Radio Transceiver (running in RX only), MicroSD Card Reader, and an Arduino Nano
It is powered from a single 9V battery
The specific components are as follows:
- Arduino Nano (with USB C port)
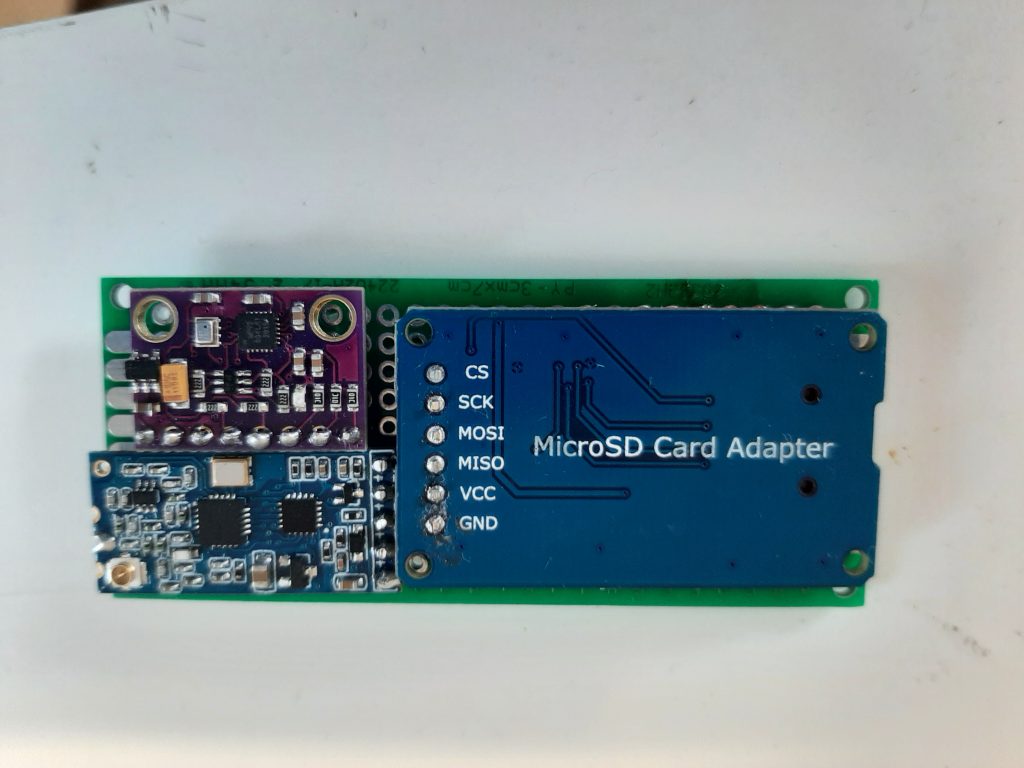
- GY-91 10DOF IMU (mpu9250 + bmp280 in a very small form factor)
- ATGM336H-5N Mini GPS Module (Chosen due to small size)
- HC-12 Radio Transceiver
- MicroSD Module with 5V logic converter (Non optimal due to large size and cpu intensive operation, will be replaced with a Openlog Datalogger for version 2)
They were all purchased from this store in china
In the end the code uses 97% of program memory and 73% of RAM after extensive optimization
(This code will later be uploaded together with the data management and analyzation program which is currently in the works)
The computer does the following things:
- It takes Acceleration, Orientation, Magnetic Field, Height, Temperature, GPS location and Time Measurements 20 times a second, and writes them to the MicroSD
- Every second it takes the latest data and sends it to the HC-12 for low throughput telemetry and more importantly locational data
- It blinks some lights to indicate its alive and well
That is it.
This is due to the very limited program memory mostly being taken up with the vast array of libraries required for interfacing with the various modules
This also means no pyro channels can be integrated into this current iteration because no height detection code could be implemented to deploy parachutes because of the size restrictions
Version 2 will probably use a different micro controller to get around this problem also
A blue LED was also installed for basic error codes and life indicator
On startup, if the MicroSD is not detected it blinks until the computer is restarted with a recognized MicroSD to prevent accidental dataloss
If a MicroSD is detected and initialized, it will turn on for 1 second to indicate then, and then pulse whenever a telemetry signal is sent
This is to indicate that the unit is alive and working
Now, for the construction:
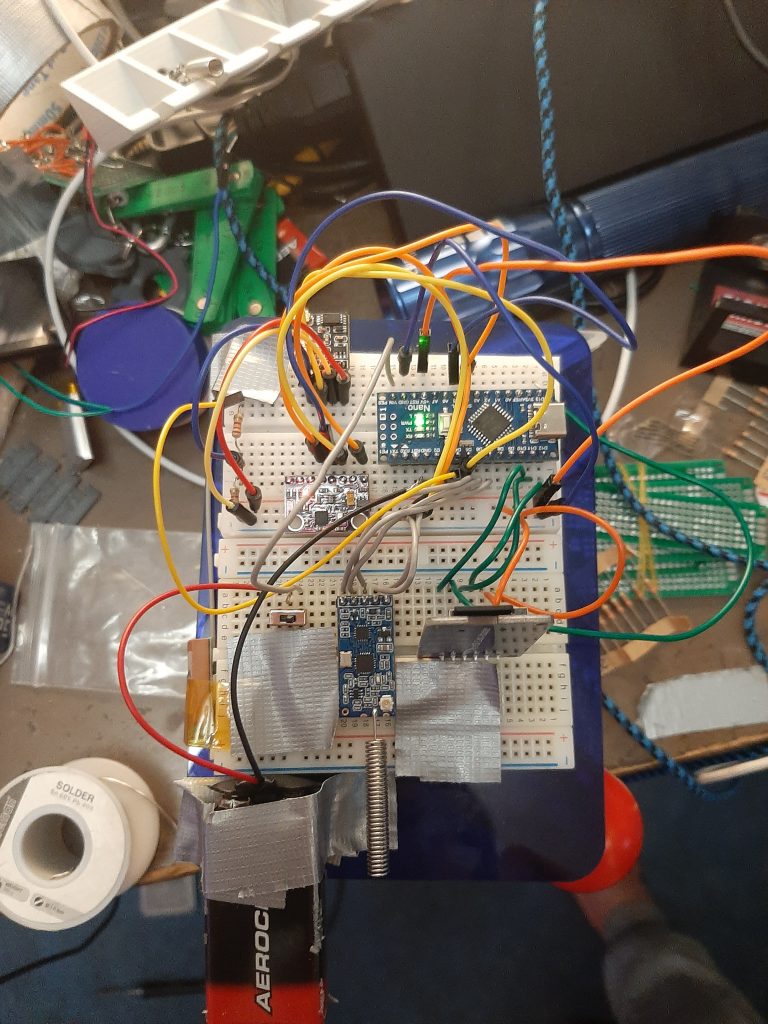
First, All Components were installed on a breadboard and tested individually to figure out the interfaces and libraries
Then, a month of not much happened
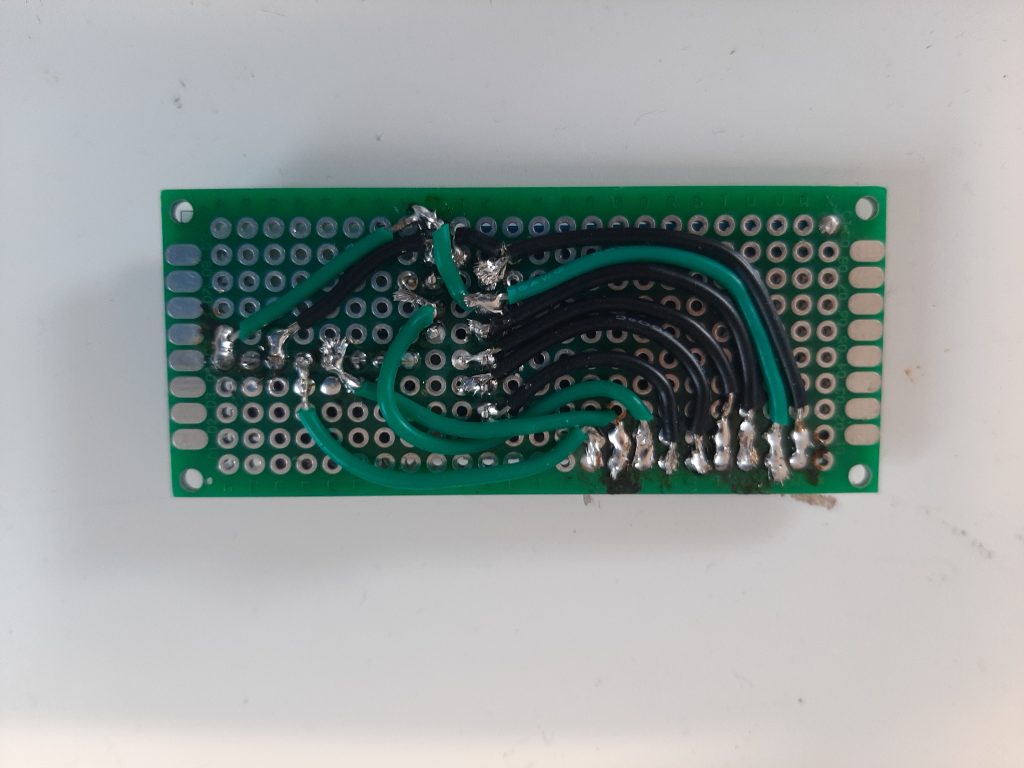
After this brief interval, the code was cleaned and it was installed on a protoboard to finish her up
It actually consists of 2 smaller breadboards folded on top of each other for compactness
This took multiple hours of soldering, and another hour of finalizing
Very rough wiring diagram
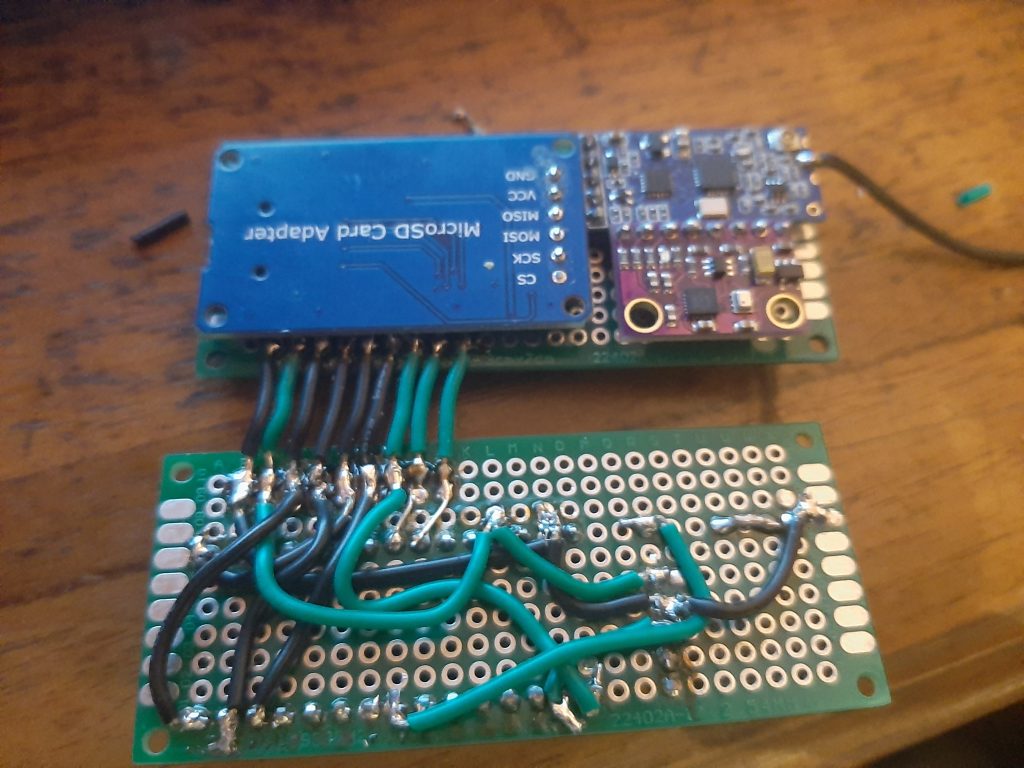
The Module Board:
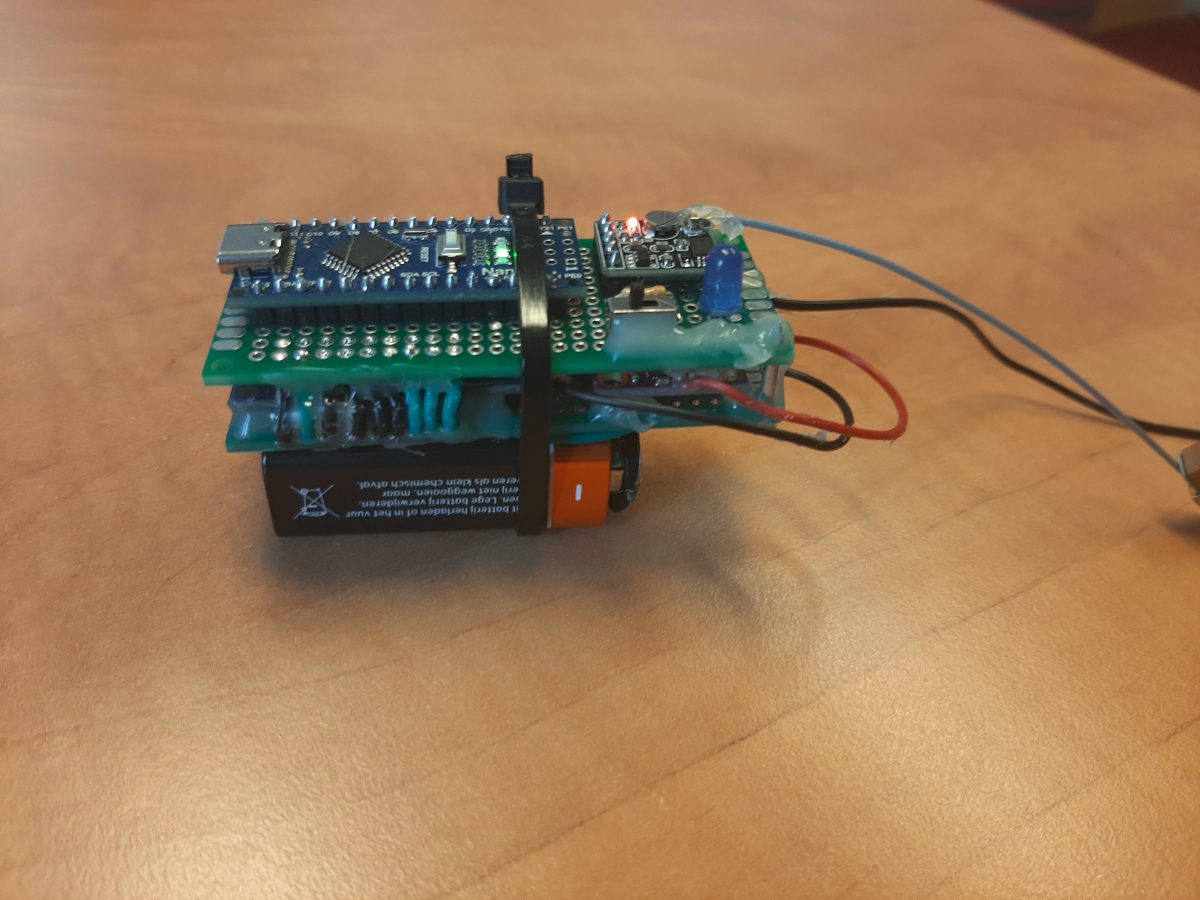
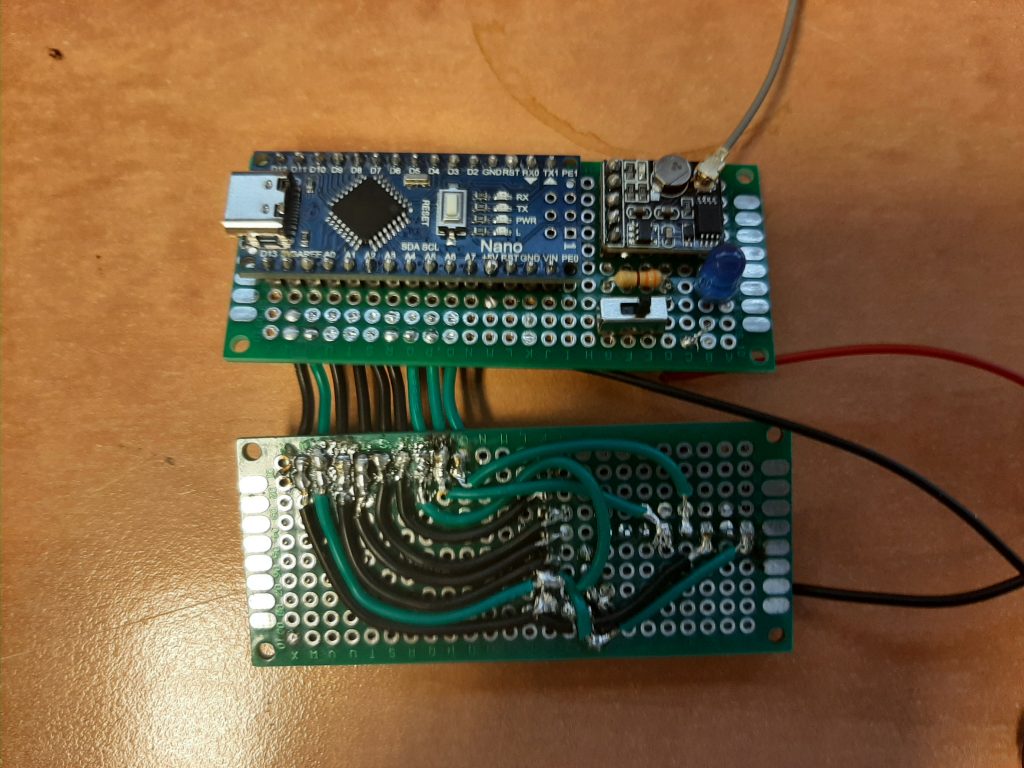
Computer Board & Fully Soldered RFC:
No Pictures of the Computer Board alone exist due to time constraints during construction
Many thanks to my friend for letting me solder this together at his place, his help, company and equipment made short work of it
Hot glue was then applied to all connections and components to prevent shorting and secure them to nothing would break

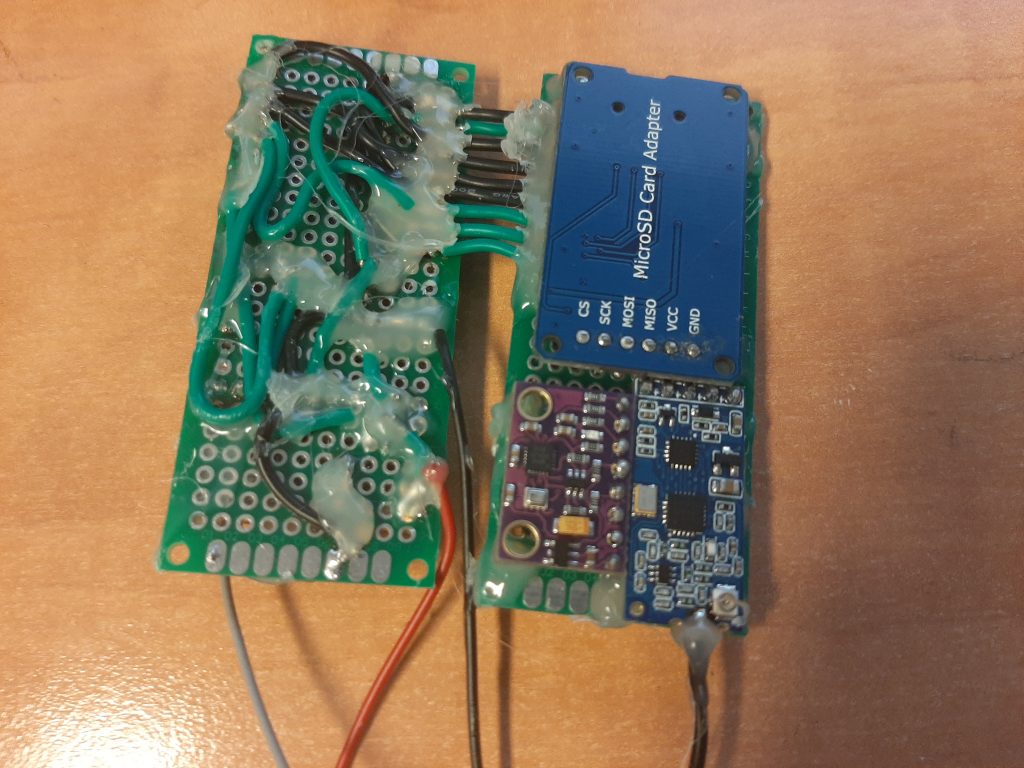
Both Boards With Antennas:
It was then folded over and more glue was applied to secure it together
The 9V Cell was mounted on the bottom of the module to hold it in place during testing and transport, it will be placed elsewhere in the fuselage in the rocket due to center of gravity issues and size

It weighs about 91.41 grams with battery, 44.72 without
Here is what 1 second of data looks like:
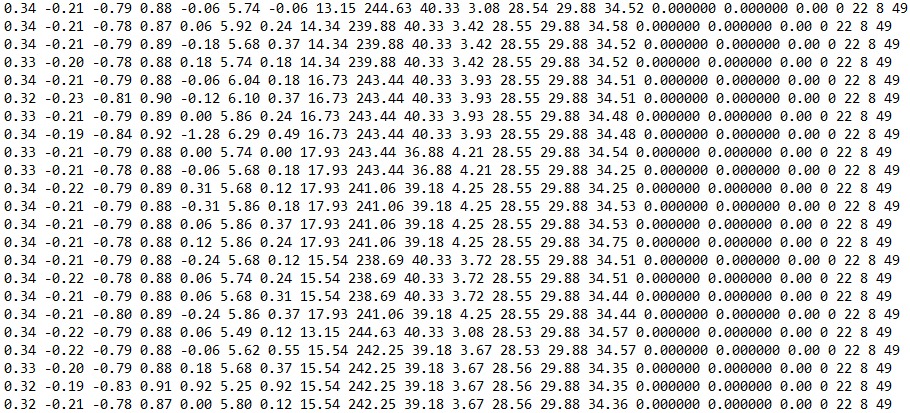
The main problem with it is that this is not human readable, a program is currently being developed to process and analyze this data
(Note that the GPS location is 0.00000, this is due to it being inside and not having a GPS lock, and because I don’t want my precise GPS coordinates on the internet)
Since all data is logged to the MicroSD card, recovery is of utmost importance
This is what the GPS and HC-12 are for
Both the GPS and the HC-12 are too slow for live telemetry, they are however perfectly suited for finding a stationary rockets location
If the rocket launches out of sight, all that needs to be done (in theory) is get near enough it that you can pick up the telemetry and then just pop the location into a GPS and you got the precise tree it is stuck in
If the GPS Fails or the radio is too far away, a directional antenna could still be used to find its direction or even triangulate its position from the radio signal
The desired option is of course the coords
For this a downlink system was needed, and developed
Pictured here is the receiving station:
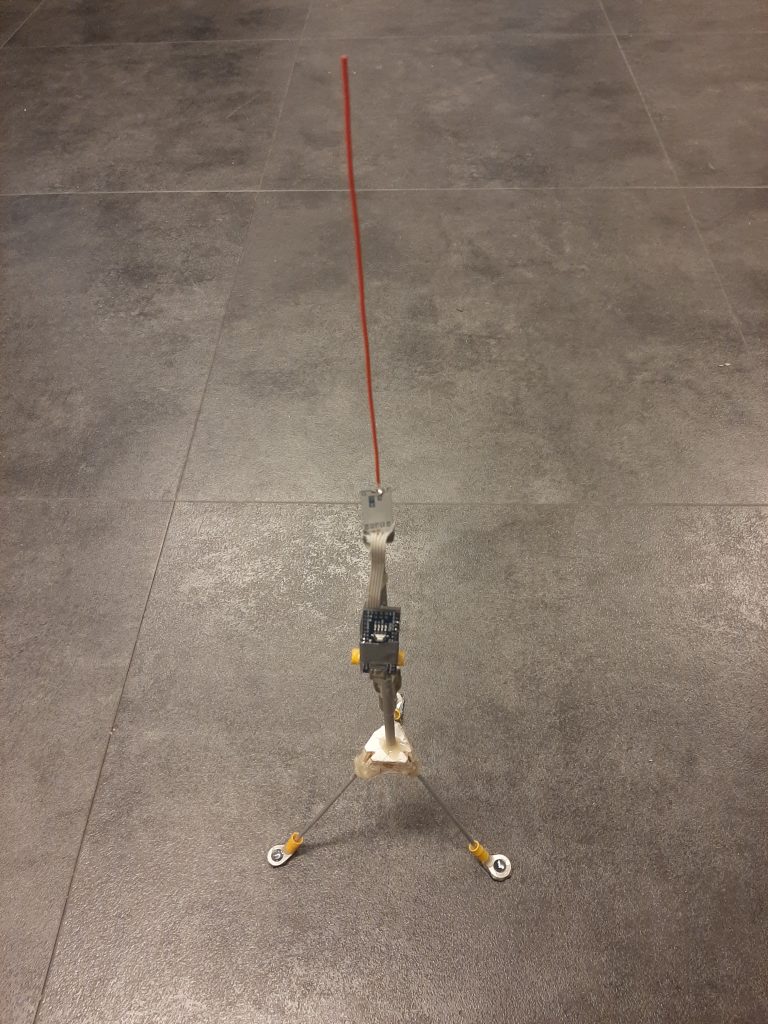
It consists of a Arduino Nano sending over USB Serial everything it receives on the HC-12
(another big thanks to my friend for making specially tuned antennas for the RFC and receiving station)
It is quite stable, and can be operated from any laptop or phone with a serial monitor
The RFC is finished and considered flyable
The main problem now is lack of decoding software and a rocket to fly it on
The software is under development (and so is the rocket), and my friend has kindly offered to test them on his race drone’s to get some data to work with
All code and the analyzation program will be uploaded to Github when finished, and a link to there will be placed here
Thats all for now
Edit:
As requested, the various iterations of the code I wrote, presented as is.
Now I’m no great coder, and when I wrote this I was even worse at programming than I am now, so don’t expect anything spectacular, or even good.
It is, somewhat to my own surprise, commented, but the quality of these can not be guaranteed.
Still, the code can still serve as somewhat of a reference and / or starting off point, and I hope someone can get something out of it.
(Provided as is, without warranty. I am not responsible if you use this code and it doesn’t work)
(Use 7-Zip if you cannot open the file)
Hi Denneth I am working on HC12 with Arduino and MPU6050 and I saw your post
are you going to post your codes? Do you mind sharing your efforts?
from Singapore
Regards
Zen
Hello Chong,
Thank you for checking out my site!
I dug up and uploaded all the code I wrote for this project, you can find it at the bottom of the RFC v1.2 post.
I was using a different MPU module (a MPU9250), so you will most likely have to find a different library.
As for the code itself, I wrote it a while ago, and its not very neat, but it did work, so maybe you can still learn something from it.
This particular flight computer sadly never flew, and the improved variant I built later I have as of yet failed to document, so I’m afraid I cannot provide anything better out of pocket.
Still, you asked for the code I used, and you can have it, feel free to use it if you find it to be useful.
Good luck with your projects!
Regards,
Denneth