
I have wanted a control panel for as long as I can remember.
A big one, with as many buttons and switches and dials and knobs as can be fit on.
It was hard for childhood me to think of something more fun than to sit inside the equivalent of a 60’s jet bomber cockpit and play pretend with the thousands of controls.
Now, as an adult1A young one, but still, I realized that I’ve developed both the skills (when it comes to electronics, as well as embedded programming) and the disposable income to actually build a full blown control panel.
I’ve been thinking and sketching various panels, layouts, and functions for the past few years, and am now in the first stages of actual construction.
But before I start sawing wood and soldering components, I wanted to lay out the plan and the goals of this project.
Why?
I like interesting things, and feel that the world conspires against them.
Not by malice, of course, but trough cold, uncaring, calculating, cost benefit analysis2Gasp!.
Take mobile phones for instance.
Over the past 25 years, we have gone from numerous different bespoke designs (clam-shells with keyboards, flip-phones, sliding keypads, rotating screens, etc.), to rectangles with a touchscreen, some indicator lights, and a handful of buttons, to having just rectangles, without any buttons on the front at all.
(And don’t get me started on headphone jacks)
This is not necessarily bad, in fact, the evolution (and reduction in cost) of the modern touchscreen is a technological marvel which allows many things which would have been exceedingly expensive to implement in hardware to be easily implemented trough software alone.
But, at the cost of homogenization, and a lack of tactility, which I mourn.
What I seek is personality, and physical interactability, both of which are hard to come by in modern technology.
Hence the control panel: Because the antitheses of modern design is that of the 1950’s3although this is more because of basic technological reasons than it is because of ideological superiority or anything of the sort.
There are innumerable ways for me to access various bits of information or control pieces of technology using just my phone: Calendar, (World) Clock, the Weather, turning on and off my lights, etc etc.
But I yearn for dedicated displays, physical switches, and the aesthetics of the space race or a nuclear reactor.
And since the world at large is not about to forsake their practice of selling various sleek black rectangles and cuboids, I guess I’ll just have to build this control panel myself.
Core Design Tenets
I’ve sketched out a few core principles which guide the overall design:
- Absolutely no touch screens4This entire project is supposed to be my personal antidote to being forced to tap on so much glass
- As modular as reasonable, with a focus on independent operation
- All modules should be operable, configurable, removable, installable, and programmable without having access to the back (within reason)
- If something can be a button, a switch, or an indicator (as opposed to being a widget on a screen), it should be implemented as such
- Care should be taken to avoid duplication however
- Due to the partly aesthetic goals, information density is allowed to be prioritized above readability5That is, the ease of parsing the information on display, not how readable text is
- Readability should not be artificially hampered, however
- As much as possible, modules should operate without internet connectivity
- Refer back to the focus on independent operation
- Interesting is allowed take priority over Practical considerations
- As long as things remain practical
- as in: make things as interesting as possible, within reason
- No (or at least a minimum of) purely decorative elements
- Everything should have it’s purpose
From these guidelines I have derived a few basic design considerations:
- Everything is to be mounted inside a standard (following) 19-inch rack6In this particular case, my love of a practical and widespread standard is stronger than my loathing of the imperial system of measurements, although I still grit my teeth typing “inch”
- This allows my custom modules to exist in parallel with existing devices
- This also decouples my modules from the “structural layer”, meaning my control panel elements could quite easily be mounted in a different cabinet without having to make any modifications
- Modularity, and the sizing of modules, comes built in with the standard.
- This is how a large amount of control panels in industry are or were built, so I might as well
- It also allows me to build each module in turn, meaning not only do I not have to build the entire panel as one monolithic structure, I also don’t have to build it in one go, and can spread both the technical, time, and financial investments over a longer period / expend them in smaller chunks
- All connectors should be mounted on the front panel (within reason)
- This way, all modules can be removed (for modifications, for example) without having to climb into the back of the cabinet they are mounted in to undo power / data connections
- Also, I quite like
Italian cuisinethe look of exposed wiring, so this adds to the aesthetics for my purposes
- Each module gets it’s own Micro-controller
- This, while it definitely costs more, both supports my “independent operation” directive, and helps compensate for my lack of embedded programming skill (No need to handle numerous simultaneous inputs and outputs and their timings, or optimize too much for memory when using (multiple) libraries)
- As this is a personal project, and I hope to “finish” it (as far as art can ever be finished), it is hoped this can allow me to focus more on getting things done rather than chasing efficient engineering practices which I don’t need to follow, at the cost of some extra expense and technical inefficiencies / idiosyncrasies
- See this ramble by Joe Barnard of bps.space for more
(And yes, I am aware this segment basically is just two lists, but lists are great and I am rather fond of writing them, so this will keep happening)
The “Structural Layer”
All this talk of modules is great and all, but modules call for a modular mounting solution, hence the defining design choice to make everything 19-inch rack mountable.
Of course7In a matter of speaking, I’d be surprised if my idiosyncratic design decisions end up being “obvious” to anyone but me , the 19 inch rack has to be “full size”, that is, about the size of a grown man, so that the largest possible fraction is easily operable from a standing position.
This is in large part because most of these controls, while planned to be useful in their way, are only going to be used occasionally and momentarily, so building this as a control console would not be practical, and neither is bending down to check the weather.
The thing is, a full height (+-1.8 meters) 19-inch rack seems to cost between 500 and 1000 euro’s, which is far outside of my rather austere budget.
I did find that a 20 unit (+- 90cm) segment of rail was only about 10 bucks!
So last February on finding this out I promptly put 4 on back-order at the local A/V specialist dealer.
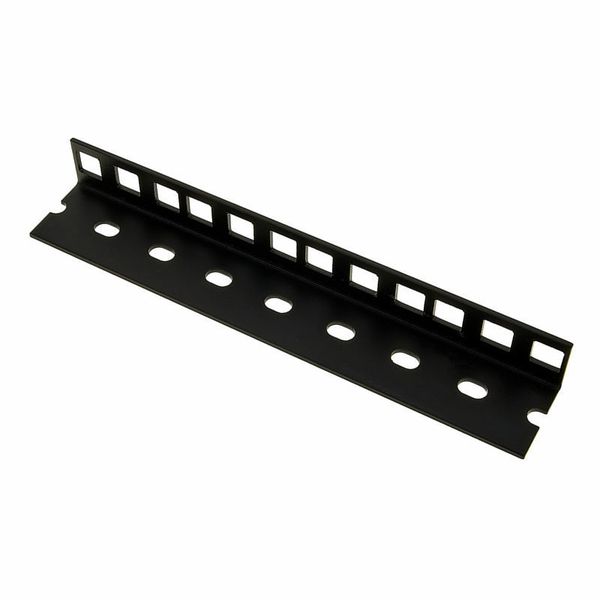
This was an important moment as, together with the requisite mounting materials (such as cage-nuts and other metallic paraphernalia) this did add to a not insignificant (to me) sum of money, which acted as the sunk cost that allowed me to justify a few even more expensive orders for various electronic components, and got the ball rolling on bringing this project from the planning / musing phase in which it had languished the preceding years.
So of course the shop went bankrupt a week after my order…
So after some waiting, the remains of the shop being bought, a lot of emailing with the new owners, even more waiting, and more emails, I eventually received (only a few weeks ago) the rack rails in question, which has kicked me back into action.
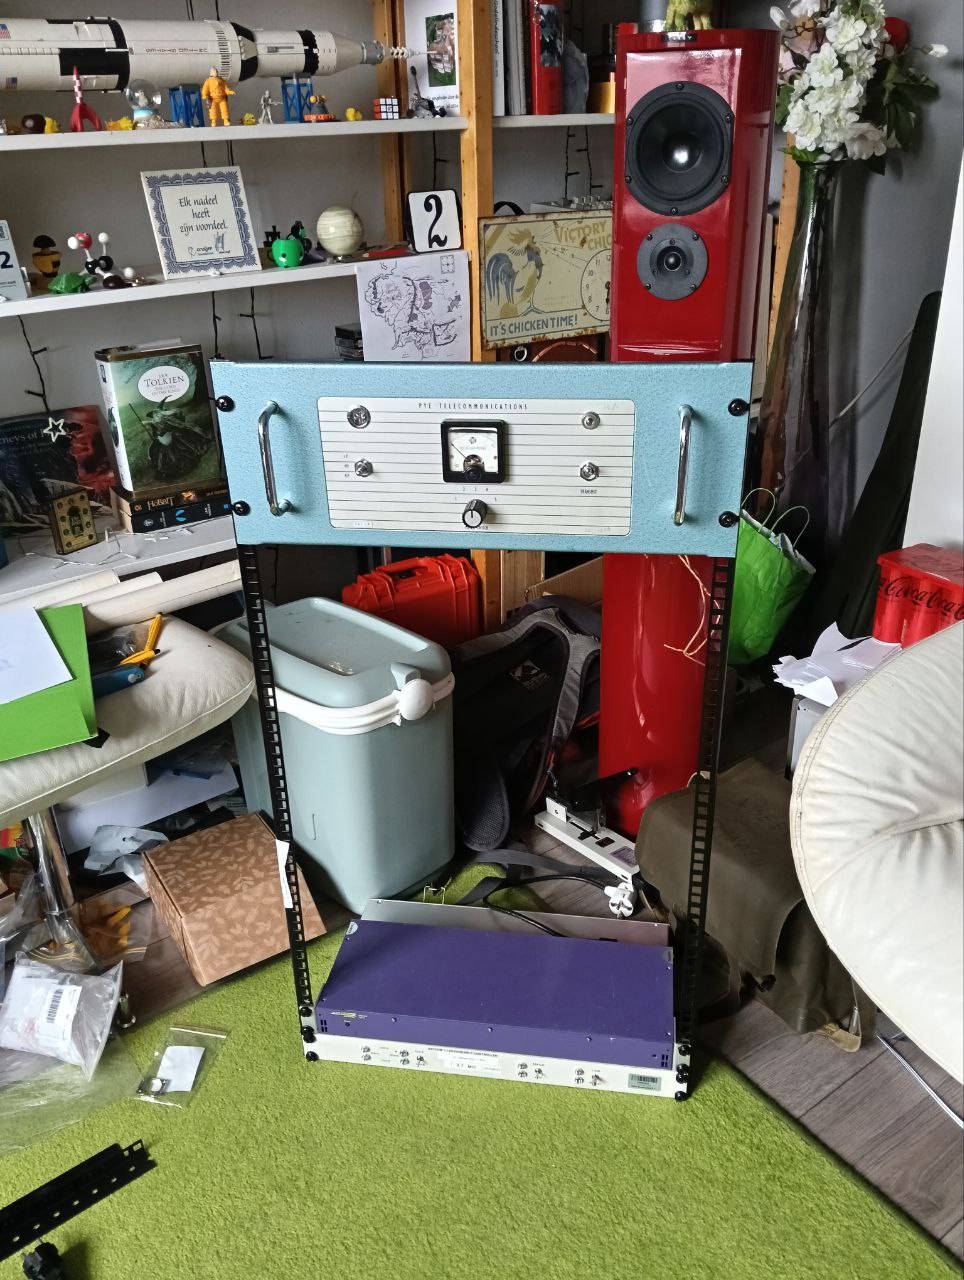
The next step now is going to be turning these bits of bent steel into a standard-compliant-ish standing cabinet that suits my needs.
I would love to build it out of steel, but with my budget (and lack of skill in the fabricative arts) it’s looking an awful lot like it’s going to be made out of low-tech wood. (although with my focus on making everything rack compatible, moving it to a nicer one in the future should not be too much trouble at all)
All my cabinet based ambitions do have the stipulation that they are made in two parts (more specifically, equally sized top and bottom segments bolted together), to better facilitate moving them for whenever I move out, and so that they can be placed side to side if any of my future dwellings can’t provide the spare floor-space for the thing.
Another advantage “rolling my own” has in this case is that it allows me to build the thing with a rather conservative depth, which is useful as it limits the amount of floor-space it takes up (a limited resource indeed), especially as most all of that space won’t be used as my modules don’t require the length of, say, an enterprise server, being mainly flat plates with a micro-controller and small protoboard in the back (sticking out perhaps 10 – 15 centimeters, the electronics required to drive switches and indicators is a rounding error compared to the stuff they had to put up with (and put into racks) in the previous century.
Once the rack itself is done and installed, I can start proper work on the panels themselves, although plenty of preliminary design and part sourcing is already happening.
The Panels Themselves
The basic idea for the modules is to keep them as basic as possible.
Instead of trying to make them of nicely powder coated metal on the first go, the idea is instead to make them out of the cheapest wooden plate material I can buy, possibly even unpainted, both to incentivize changes and ad-hoc additions to the panels (as nothing will ever be perfect on the first go, and the best way to find what works and what does not is usually trough use and not theory), and to compensate once more for my lack of skill in the area of drilling neatly aligned holes.
If I can make another panel for basically no cost, drilling a wrong hole or failing to cut out a bezel for a display should carry little consequences apart from providing an opportunity for more practice.
This does mean that during the initial stages of development, the panel itself is unlikely to look conventionally “good”, with raw wood and crooked switches adorning the front, but this aesthetic sacrifice comes with the aforementioned ease of manufacture which I hope will lead to better functionality in the long run, and allows me to focus on interactivity and complexity instead of looks.
The electronics are slated to mount onto a solder-able protoboard, mounted at a 90 degree offset onto the back of the panel, with simple headers that connect to the switches and such (less hard-wiring makes development easier and reassembly less painful), and more expensive components such as the Micro-Controller also being impermanently plugged in so that they also can be replaced.
This has the effect of the (cheap) protoboard and its wiring being the only thing permanently soldered together, meaning a complete overhaul of a panel would only involve remaking / replacing the board, without any of the functional components requiring replacement or de-soldering.8another thing which I am not good at, and loathe to do
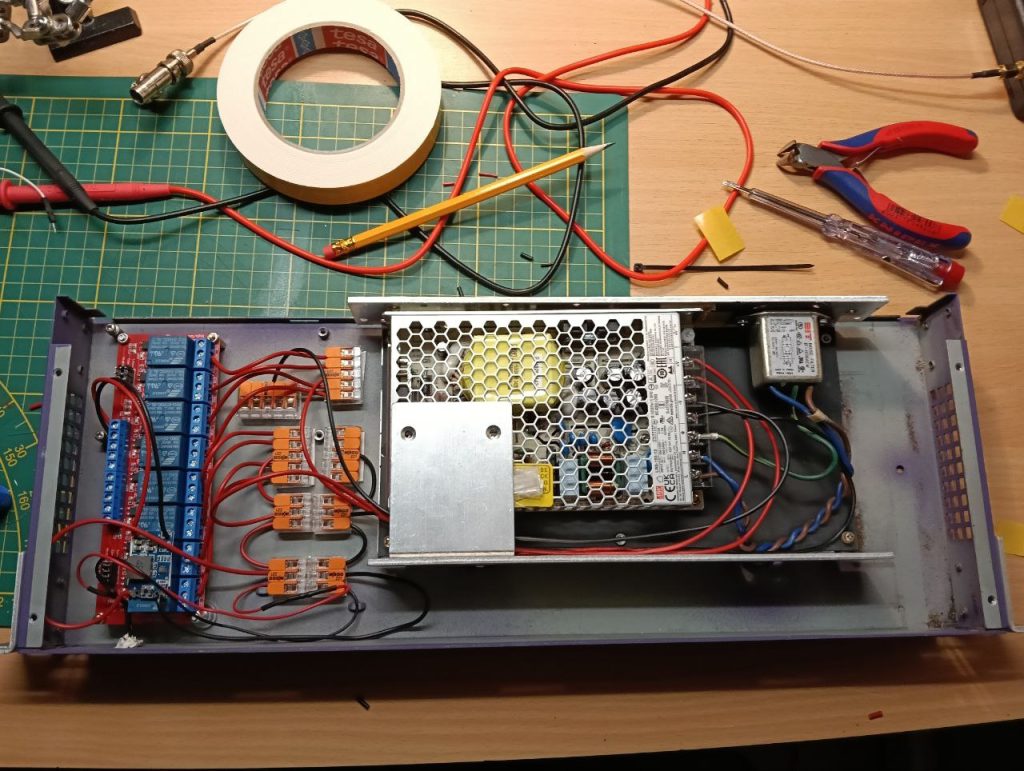
The first Module that I plan to construct is the Power Supply Unit, with it’s assorted connectors and switches, as all other units should get their power from this one feed.
For this I’ve already retrofitted an old Server-Grade Redundant Power Supply, which I mainly wanted to retrofit due to it’s uniquely millennium shade of indigo.
Once this is done (which mainly involves building a panel for the connectors and switches to break this unit out), I plan to work on the functional modules themselves. Ideas for which include:
- A Precision Clock
- An Audio Patch Panel to supplement my DIY-HiFi9Note to future me: you should really write that article on the amplifier you built, and then link it here (which is also rack mounted)
- A DIY Relay attenuation for arbitrary volume control
- Google Calendar Display (doubling as a weather display), with receipt printer functionality
- Environmental monitoring unit (Temperature, Humidity, Co2, Particulate Matter, Ionizing Radiation, etc)
- Various Smaller Modules
- An Executive Decision Maker
- An emulated Telmac-1800 permanently running Chesmac
- Numerous light switches
- A Speech Synthesis System
And, one hopes, many more things not yet dreamed off.
The selection I’ve just written down (and have sketched out as various iterations over the years) should keep me busy quite a while on its own however.
I hope to have the rack and the first modules done Q1 2026, although Life often finds a way to intervene with such plans.
Overall though I am very exited to get started, not something I can say I’ve had often recently (hence the lack of articles on my website)
Up Next: The Rack
One thought on “The Great Controller: Project Layout”